Welcome to the Little Sew and Sew Manual! This guide introduces you to a compact, lightweight sewing machine designed for beginners.
Learn threading, troubleshooting, and maintenance tips to get started with your sewing projects. Perfect for basic mending and crafting, this manual covers everything you need to know.
1.1 Overview of the Little Sew and Sew Sewing Machine
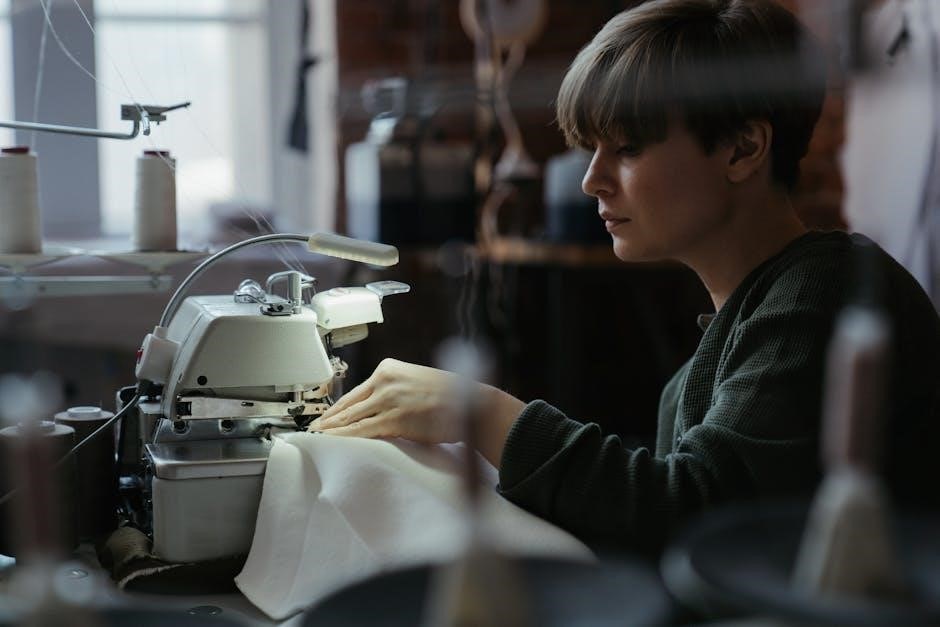
The Little Sew and Sew sewing machine is a compact, lightweight, and user-friendly device designed for basic sewing tasks. Perfect for beginners, it offers a simple interface and essential features for small projects and repairs.
Ideal for young sewists or hobbyists, this machine is easy to operate and comes with a comprehensive manual to guide you through setup, threading, and troubleshooting, ensuring a smooth sewing experience from the start.
1.2 Importance of the Instruction Manual
The instruction manual is crucial for mastering the Little Sew and Sew machine. It provides step-by-step guides for threading, troubleshooting, and maintenance, ensuring safe and efficient operation.
By following the manual, users can prevent common issues, maximize machine performance, and enjoy a seamless sewing experience, making it an essential resource for both beginners and experienced users alike.

Setting Up Your Little Sew and Sew Machine
Unpack and inspect the machine for damage. Assemble according to the manual, ensuring all parts are securely attached. Place it on a stable surface for optimal performance.
2.1 Unpacking and Initial Inspection
Start by carefully unpacking the Little Sew and Sew machine from its box. Inspect all components for any visible damage or wear. Ensure all accessories, like the power cord, needles, and bobbin, are included and undamaged. This step ensures everything is ready for assembly and use.
2.2 Assembling the Machine
Attach the table clamp to the machine base and align it with the surface. Secure the clamp tightly to ensure stability. Place the machine on a flat surface, ensuring all parts are properly aligned. Check the needle and bobbin area before turning on the power.
2.3 Placing the Machine on a Stable Surface
Place the Little Sew and Sew machine on a flat, sturdy surface, such as a table or countertop. Ensure the area is clear of clutter and well-lit. Avoid uneven or soft surfaces to maintain stability and prevent vibrations during operation. Secure the machine firmly to ensure safe and effective sewing.

Threading Your Little Sew and Sew Machine
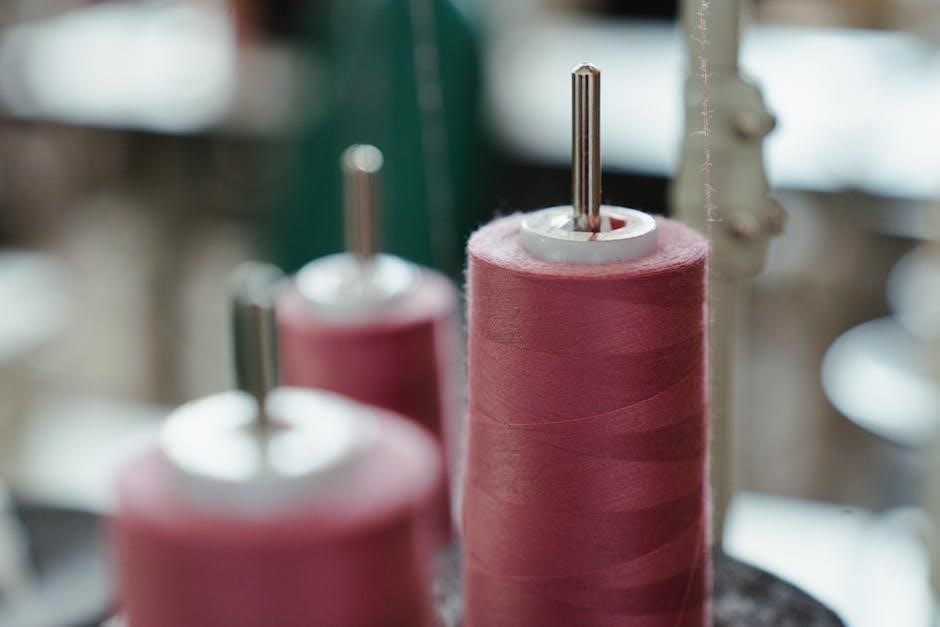
Threading is essential for proper operation. Use high-quality thread to prevent jams. Follow the manual’s step-by-step guide for correct threading to ensure smooth stitching and avoid breakage.
3.1 Understanding the Threading Process
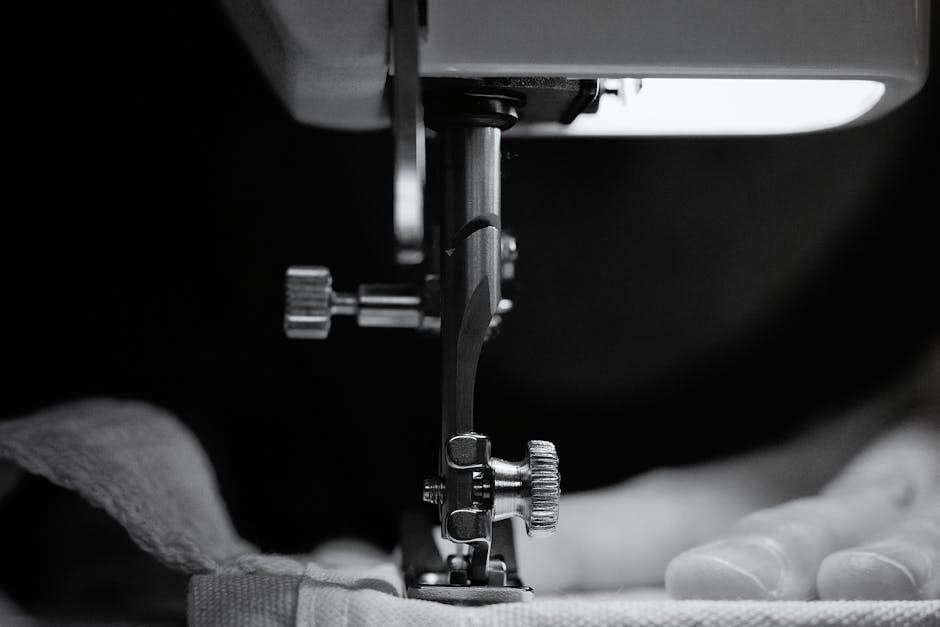
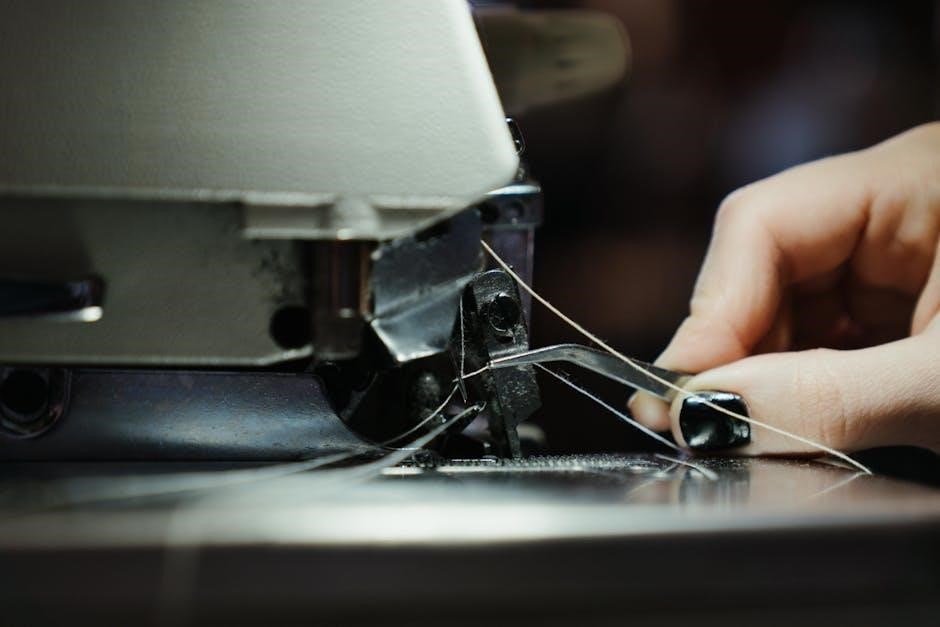
The threading process involves guiding the thread through specific machine parts. Start by turning the handwheel to raise the needle. Then, carefully pass the thread through the spool pin, tension discs, take-up lever, and finally, the needle. Proper alignment ensures smooth operation and consistent stitches.
3.2 Step-by-Step Threading Guide
Turn the handwheel to raise the needle to its highest position.
Insert the thread into the spool pin and gently pull it through the tension discs.
Loop the thread around the take-up lever.
Guide the thread through the needle’s eye.
Pull the thread to ensure it’s seated properly.
This ensures smooth stitching and prevents jams.
3.3 Common Threading Mistakes to Avoid
Avoid pulling the thread too tightly, as it may cause uneven tension.
– Never thread the machine without raising the needle fully.
– Keep the thread untangled to prevent knots.
– Ensure the thread is properly seated in the tension discs.
– Avoid using low-quality thread, as it can lead to breakage.
These tips help ensure smooth stitching and reduce jams.
Basic Sewing Operations
Master essential sewing skills with your Little Sew and Sew machine. Learn to start your first stitch, sew forward and backward, and adjust stitch settings for perfect results every time.
4.1 Starting Your First Stitch
Begin by raising the needle to its highest position and ensuring the presser foot is lifted. Place your fabric evenly under the needle, lower the presser foot, and gently press the power switch to create your first stitch.
- Ensure the machine is properly threaded.
- Guide the fabric smoothly for consistent results.
4.2 Sewing Forward and Backward
To sew forward, gently guide the fabric under the needle. For reverse stitching, press the reverse stitch button before sewing backward. This feature is ideal for reinforcing seams at the beginning or end of your stitching;
- Use reverse stitching for strong seam starts and finishes.
- Keep fabric aligned for smooth, consistent stitches.
4.3 Adjusting Stitch Length and Tension
Adjust the stitch length using the dial or button on your machine. Shorter stitches are ideal for delicate fabrics, while longer stitches suit thicker materials. Tension can be fine-tuned by turning the tension dial to ensure balanced stitching.
- Test adjustments on scrap fabric before sewing your project.
- Refer to the manual for specific dial locations and settings.
Troubleshooting Common Issues
Identify and resolve common problems like thread jams, uneven stitches, or machine malfunctions. Refer to the manual for solutions to ensure smooth operation and optimal performance.
- Check thread tension and bobbin alignment.
- Clean debris from the machine regularly.
5.1 Thread Breakage and Jams
Thread breakage and jams often occur due to low-quality thread or incorrect tension. Use high-quality thread like Gutermann to minimize issues. Regularly clean the machine and ensure proper threading. Adjust tension settings as needed to maintain smooth stitching and prevent fabric damage.
5.2 Machine Not Turning On
If your Little Sew and Sew machine won’t turn on, check the power source. Ensure the machine is properly plugged in and the power switch is in the “ON” position. Verify that no circuit breakers have tripped. Consult the manual for model-specific troubleshooting steps to resolve the issue quickly.
5.3 Uneven or Loose Stitches
Uneven or loose stitches can occur due to incorrect tension or thread quality. Adjust the bobbin case tension, ensure proper threading, and use high-quality thread. Check for needle damage or misalignment. Tighten stitches for lightweight fabrics and ensure the machine is correctly set up for optimal sewing performance.

Maintenance and Care
Regular cleaning, lubrication, and proper storage ensure optimal performance. Follow manual guidelines to maintain your Little Sew and Sew machine’s efficiency and extend its lifespan.
6.1 Cleaning the Machine
Regularly clean dust and debris from the machine using a soft brush. Avoid harsh chemicals; use a damp cloth for exterior wipes. Ensure the machine is dry before storing. Refer to the manual for detailed cleaning instructions to maintain performance and longevity.
6.2 Lubricating Moving Parts
Lubricate the machine’s moving parts with sewing machine oil to ensure smooth operation. Apply a few drops to the handwheel, gears, and shuttle hook. Avoid over-lubrication to prevent dust buildup. Refer to the manual for specific lubrication points and test the machine after lubrication to ensure proper function.
6.3 Storing the Machine Properly
Store the Little Sew and Sew machine in a cool, dry place, away from direct sunlight and moisture. Clean and lubricate the machine before storage. Use the original packaging or a protective cover to shield it from dust. Avoid exposure to extreme temperatures to maintain optimal performance and longevity.
Accessories for Your Little Sew and Sew
Essential accessories like bobbins, needles, and a power cord are included. Additional items such as carrying cases or extension tables can enhance your sewing experience. Always use genuine parts for compatibility and optimal performance.
7.1 Essential Accessories Included
Your Little Sew and Sew machine comes with basic accessories like bobbins, needles, and a power cord. These items ensure you can start sewing immediately. Additional components such as a table clamp and threading tools are also provided for easy operation and maintenance.
7.2 Recommended Additional Accessories
Consider adding a sewing kit with extra needles, bobbins, and high-quality thread to enhance your sewing experience. A table clamp and carrying case are also useful for stability and portability, ensuring your Little Sew and Sew machine is always ready for projects.
7;3 Where to Find Replacement Parts
Replacement parts for your Little Sew and Sew machine can be found on the official Michley or Tivax websites, or through authorized retailers. Check online marketplaces like Amazon or eBay, and refer to your model number for compatibility. Contact customer support for direct assistance.

Quick Start Guide
The Quick Start Guide provides a concise introduction to setting up and operating your Little Sew and Sew machine. Follow these steps to prepare, thread, and begin sewing your first project;
8.1 Preparing the Machine
Start by ensuring the machine is turned off and the needle is raised. Remove any loose debris and check the bobbin area. Ensure the machine is placed on a stable surface and all accessories are within reach. These steps ensure a safe and efficient sewing experience.
8.2 Basic Functions
The Little Sew and Sew machine offers forward and reverse stitching options. Use the handwheel to raise the needle and ensure proper thread alignment. Guide fabric smoothly under the presser foot for consistent stitching. Start with simple projects to familiarize yourself with these functions.
8;3 Starting Your First Project
Begin by threading the machine and ensuring the needle is at its highest position. Place your fabric under the presser foot, aligning it straight. Gently lower the presser foot and start sewing in a steady, forward motion. Practice on scrap fabric first to ensure smooth stitching and even thread flow.
Model Variations and Upgrades
The Little Sew and Sew is available in models like LSS-505 and LSS-202, offering optional upgrades for advanced features. Check the official website for compatible accessories and upgrade kits to enhance your sewing experience.
9.1 Different Models Available
The Little Sew and Sew series includes models like the LSS-505 and LSS-202, each designed for specific sewing needs. These models offer varying features such as multi-purpose stitching and compact portability, making them suitable for beginners and small-scale sewing projects.
9.2 Upgrading Your Machine
Enhance your Little Sew and Sew experience by upgrading with optional accessories like additional stitch patterns or specialized presser feet. Models such as the LSS-505 and LSS-202 offer compatibility with various upgrades. Always ensure upgrades are compatible with your machine model and consult customer support for assistance.
9.3 Compatibility with Other Accessories
Ensure compatibility by using accessories designed for your Little Sew and Sew model, such as bobbins, needles, and presser feet. Models like LSS-505 and LSS-202 support various attachments. Always check the manual or manufacturer’s guidelines to confirm compatibility and avoid operational issues with your machine.
Safety Tips for Beginners
Always keep the machine out of children’s reach and avoid loose clothing near moving parts. Use the power switch wisely and ensure the machine is off during maintenance.
10.1 General Safety Precautions
Always keep the machine out of children’s reach and avoid wearing loose clothing near moving parts. Use the power switch correctly and ensure the machine is off during maintenance. Never leave the machine unattended while it is plugged in or in operation.
10.2 Safety for Children
Children should never operate the machine without adult supervision. Keep them away from moving parts and ensure they understand basic safety rules. Use child locks if available to prevent accidental start-ups. Teach them to handle fabric and threads carefully to avoid any potential hazards while sewing.
10.3 Emergency Shutdown Procedures
In case of an emergency, immediately switch off the machine using the power button. Unplug it from the power source to ensure complete shutdown. Do not attempt to remove fabric or threads while the machine is operational. Ensure all moving parts are still before addressing the issue safely.
Additional Resources
Access the full manual online for detailed guides. Explore tutorials on YouTube for visual learning. Contact customer support for assistance with your Little Sew and Sew machine.
11.1 Downloading the Full Manual
The full Little Sew and Sew manual is available for download online. Visit the official website or authorized retailers like Tivax or Michley Electronics. Models like LSS-505 and FHSM-505 have dedicated PDF manuals. Ensure to download the correct version for your machine to access detailed setup, operation, and troubleshooting guides.
11.2 Online Tutorials and Guides
Find helpful online tutorials and guides for the Little Sew and Sew machine on platforms like YouTube and official websites. These resources offer step-by-step instructions for setup, threading, and troubleshooting. Tivax and Michley Electronics provide video guides for models like LSS-505, ensuring easy learning for beginners. Access these free resources anytime for support.
11.3 Customer Support Contact Information
Contact customer support for assistance with your Little Sew and Sew machine. Reach out via email or phone for troubleshooting or parts inquiries. Visit the official website or authorized dealers like Tivax for support. For more details, visit superpopclash.com;