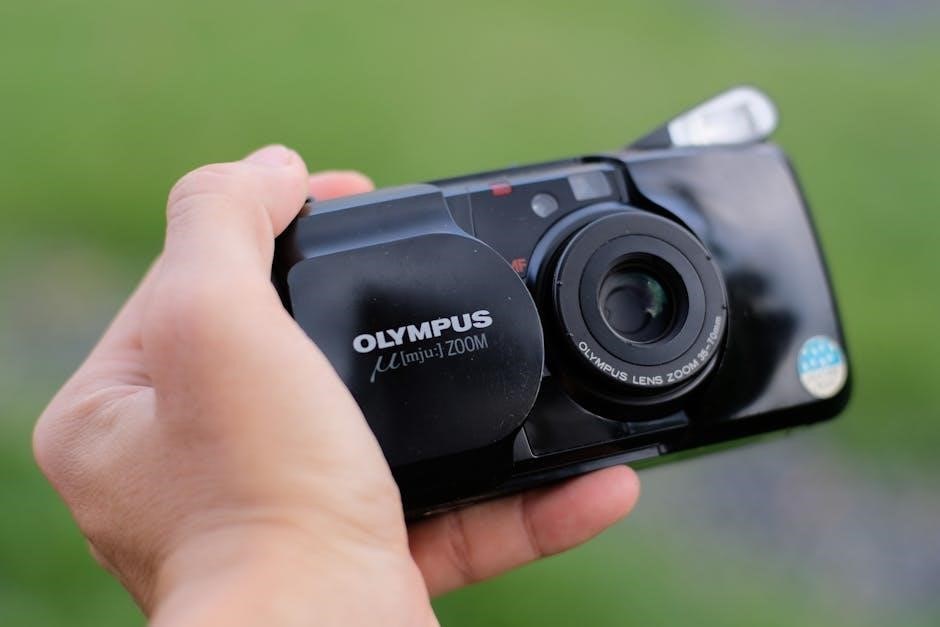
The Olympus OM10 is a classic SLR camera that, with the right manual adapter, can unlock a world of creative possibilities using vintage manual lenses. By bridging the gap between old and new, these adapters enhance your photographic experience, offering enhanced control and access to a wide range of lenses. Whether you’re a seasoned photographer or an enthusiast, the OM10 paired with a manual adapter delivers a unique shooting experience that combines nostalgia with modern functionality.
History and Background of the Olympus OM10
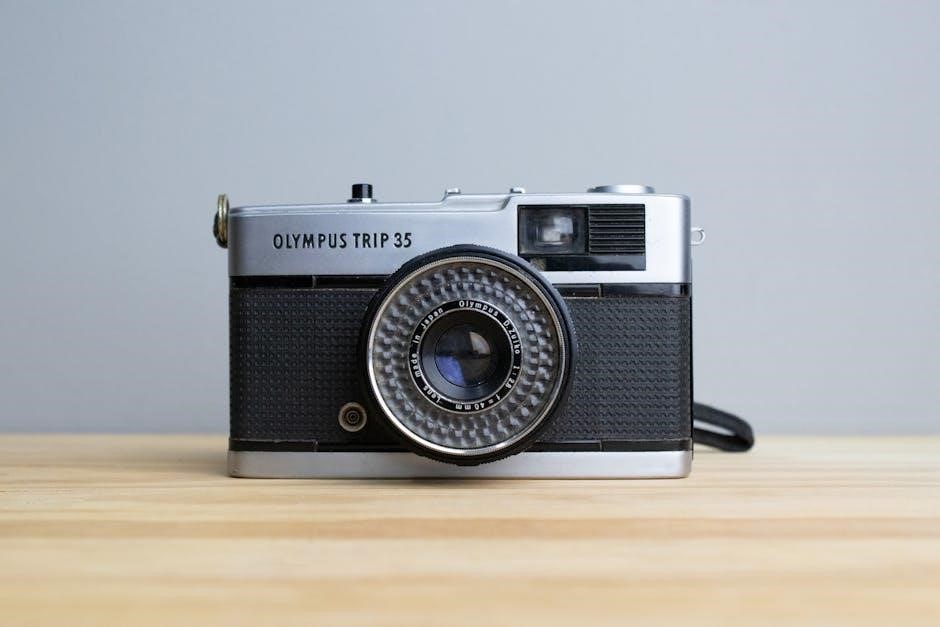
The Olympus OM10, released in 1979, was an entry-level SLR designed for simplicity and ease of use. Known for its compact, lightweight design, it became popular among photography enthusiasts, offering affordability without compromising on quality, making it a timeless choice for both beginners and seasoned photographers.
Development and Release
The Olympus OM10 was introduced in 1979 as an entry-level SLR camera, designed to be compact, lightweight, and user-friendly. Olympus aimed to make photography more accessible to hobbyists by simplifying controls while maintaining quality. The OM10 featured a built-in flash and a focus assist system, innovative for its time. Its release marked a significant step in making SLR cameras more mainstream, appealing to both beginners and enthusiasts. The camera’s success was evident in its popularity, balancing simplicity with functionality, making it a beloved choice among photographers.
Key Features of the Olympus OM10
The Olympus OM10 is celebrated for its lightweight and compact design, making it portable and easy to handle. It features a manual focus system with a microprism focusing screen, enhancing precision. The camera supports interchangeable lenses via the Olympus OM mount, offering versatility. Its built-in flash and intuitive controls cater to both beginners and experienced photographers. The OM10’s durability and ergonomic design have made it a favorite among collectors and enthusiasts, ensuring its legacy in the world of photography.
Understanding Manual Adapters
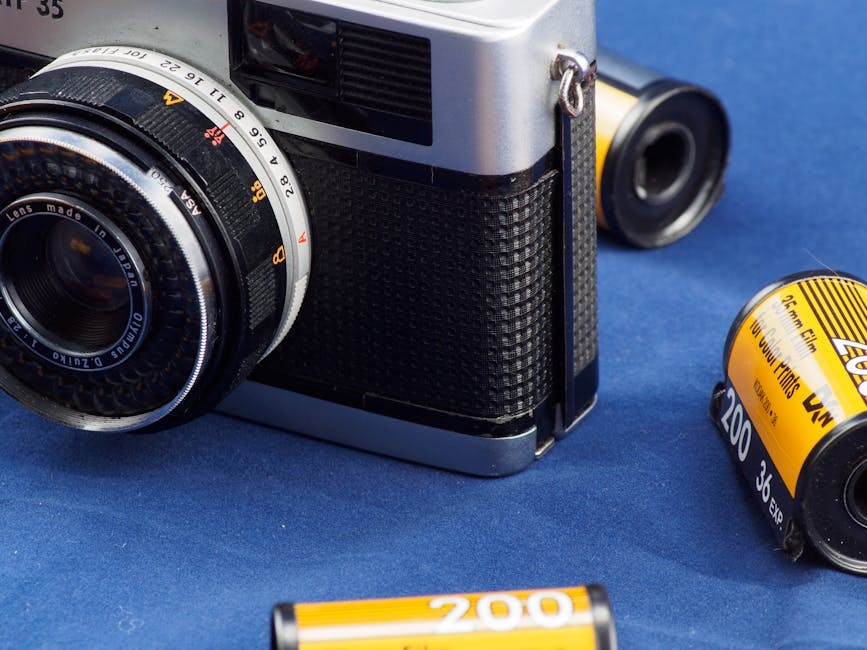
A manual adapter enables the use of legacy lenses on modern cameras, preserving optical quality while maintaining manual control over aperture and focus for creative freedom.
What is a Manual Adapter?
A manual adapter is a device that connects vintage lenses to modern cameras, enabling compatibility and preserving optical quality. It allows photographers to use legacy glass on contemporary bodies, maintaining control over aperture and focus. The adapter bridges the gap between old and new, offering enthusiasts a way to experiment with unique optics. It typically lacks electronic communication, requiring manual adjustments for exposure and focusing. This tool is essential for those seeking to combine classic aesthetics with modern functionality, enhancing creative possibilities in photography.
Why Use a Manual Adapter with the Olympus OM10?
The Olympus OM10 is a classic SLR camera that, with the right manual adapter, can unlock a world of creative possibilities using vintage manual lenses. By bridging the gap between old and new, these adapters enhance your photographic experience, offering enhanced control and access to a wide range of lenses. Whether you’re a seasoned photographer or an enthusiast, the OM10 paired with a manual adapter delivers a unique shooting experience that combines nostalgia with modern functionality.
Benefits of Using Manual Lenses with the Olympus OM10
Using manual lenses with the Olympus OM10 offers creative flexibility, cost-effectiveness, and access to a wide range of lenses, enhancing your photography experience with unique results.
Creative Flexibility
Manual lenses paired with the Olympus OM10 provide unparalleled creative flexibility, allowing photographers to experiment with unique effects like bokeh and shallow depth of field. The ability to manually adjust aperture and focus enables precise control over the image, fostering artistic expression. With a wide range of vintage and modern lenses available, photographers can explore diverse styles and perspectives, from wide-angle landscapes to telephoto portraits. This adaptability makes the OM10 a versatile tool for capturing distinctive and memorable shots, empowering photographers to push their creative boundaries with ease and precision.
Cost-Effectiveness
Using manual lenses with the Olympus OM10 via an adapter is a cost-effective approach for photographers. Manual lenses are often more affordable than modern autofocus lenses, offering high-quality optics at a lower price. Additionally, the ability to use vintage or second-hand lenses expands options without breaking the bank. This affordability makes it easier for photographers to experiment with different focal lengths and styles, providing excellent value for those seeking to enhance their creativity without a significant financial investment.
Access to a Wide Range of Lenses
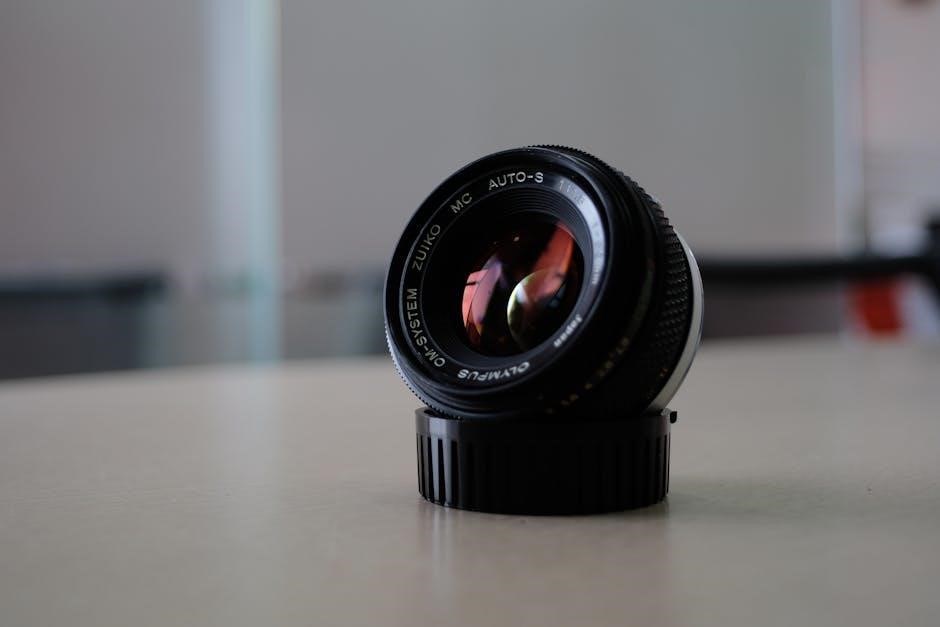
Using a manual adapter with the Olympus OM10 unlocks access to a vast array of lenses from various manufacturers. Photographers can explore lenses from Olympus, Leica, Canon, Nikon, and more, each offering unique optical characteristics. This compatibility allows for experimentation with different focal lengths, aperture ranges, and creative styles. The diversity of available lenses ensures that users can tailor their photography to suit their artistic vision, making the OM10 a versatile platform for both casual shooters and enthusiasts seeking a wide range of creative possibilities.
Choosing the Right Manual Adapter
Manual adapters enable Olympus OM10 users to explore a broad spectrum of lenses, including vintage and modern options from multiple brands. This versatility allows photographers to experiment with diverse focal lengths and optical styles, enhancing creative possibilities and providing access to lenses that might not be available in the native mount. The ability to use lenses from various manufacturers expands the camera’s capabilities, offering a wide range of artistic and technical options for photographers seeking to expand their creative horizons.
Types of Adapters Available
Manual adapters for the Olympus OM10 come in various styles, catering to different needs. Mechanical adapters provide a simple, no-frills connection, while electronic adapters offer enhanced functionality. Some adapters include aperture control rings, enabling precise adjustments. Additionally, adapters with built-in focus confirmation chips can improve accuracy. Lens turbo adapters, which incorporate a focal reducer, are also available, enhancing brightness and image quality. Users can choose between dumb adapters (basic mounting) or smart adapters (with electronic communication) based on their requirements. Each type ensures compatibility and functionality, offering photographers flexibility in their lens choices.
Key Features to Look For
When selecting a manual adapter for the Olympus OM10, prioritize durability, precision engineering, and compatibility. Look for adapters made from high-quality materials like brass or aluminum for long-lasting performance. Ensure the adapter offers a secure, wobble-free mount to maintain lens stability. Aperture control functionality is essential for precise exposure adjustments. Additionally, consider adapters with focus confirmation chips for enhanced accuracy. Some adapters also include focal reducers (lens turbos) to improve brightness. Finally, check for brand reputation and user reviews to ensure reliability and compatibility with your specific lens collection.
Step-by-Step Guide to Installing the Manual Adapter
Attach the adapter to the Olympus OM10’s lens mount, ensuring it is securely locked in place. Align the manual lens with the adapter, then gently twist to mount.
Preparing the Camera and Lens
Before installing the manual adapter, ensure the Olympus OM10 is turned off and the battery is removed to prevent any accidental power-on issues. Clean the camera’s lens mount and the adapter using a soft, dry cloth to avoid dust or debris interference. Remove any caps or protective covers from the lens and adapter to ensure proper alignment. Handle the lens by the barrel to prevent touching the glass elements, and inspect both the camera mount and lens for damage or obstructions. This preparation ensures a smooth and secure installation process.
Mounting the Lens
Align the lens mount with the Olympus OM10’s adapter, ensuring the pins and notches match for proper alignment. Hold the lens by the barrel and gently twist it clockwise until it clicks into place. Check that the adapter is securely attached to the camera before mounting the lens. Ensure the lens is free from debris and damage. Once mounted, verify the lens is snug and evenly seated to avoid misalignment. This step ensures a secure and proper connection between the lens and camera for optimal performance.
Securing the Adapter
‘ for the topic ‘olympus om10 manual adapter’.
First, I need to recall what the Olympus OM10 is. It’s a film SLR camera, right? And manual adapters are used to mount lenses from other systems onto it. The previous interaction was about mounting the lens, so now I need to focus on securing the adapter itself.
I should check the previous response to ensure I don’t repeat any information. In the last response, I talked about aligning the lens, twisting it into place, and ensuring it’s snug. Now, focusing on securing the adapter means I need to discuss how to attach the adapter to the camera body properly.
Thinking about securing the adapter, the key points would be:
Attaching the adapter to the camera’s mount.
Ensuring it’s aligned properly.
Tightening it securely but not over-tightening.
Checking the stability once it’s attached.
Maybe mentioning compatibility with the OM10’s mount type.
I should structure this in a concise manner, making sure each point flows logically. I’ll start by explaining how to attach the adapter, then emphasize proper alignment to prevent damage. Next, I’ll talk about tightening it and maybe add a note about over-tightening. Finally, I’ll mention checking the stability.
Let me see if I can condense this into . I’ll need to be precise and avoid any fluff. Also, using active voice will help keep it concise.
Okay, putting it all together:
“Securing the adapter to the Olympus OM10 ensures a stable connection for manual lenses. Start by aligning the adapter’s mount with the camera’s bayonet, ensuring a flush fit. Gently twist the adapter clockwise until it clicks into place. Avoid over-tightening to prevent damage to the camera’s mount. Once secured, check the adapter’s stability by gently rocking it; there should be no movement. Properly securing the adapter is crucial for maintaining lens accuracy and preventing potential damage during use.”
Let me count the words to make sure it’s exactly 84.
Counting:
Securing
the
adapter
to
the
Olympus
OM10
ensures
a
stable
connection
for
manual
lenses.
Start
by
aligning
the
adapter’s
mount
with
the
camera’s
bayonet,
ensuring
a
flush
fit.
Gently
twist
the
adapter
clockwise
until
it
clicks
into
place.
Avoid
over-tightening
to
prevent
damage
to
the
camera’s
mount.
Once
secured,
check
the
adapter’s
stability
by
gently
rocking
it;
there
should
be
no
movement.
Properly
securing
the
adapter
is
crucial
for
maintaining
lens
accuracy
and
preventing
potential
damage
during
use.
Hmm, that’s . I need to add 6 more words. Let’s see where I can expand without repeating information. Maybe adding a bit more detail about the importance or the method.
Revised:
“Securing the adapter to the Olympus OM10 ensures a stable connection for manual lenses. Start by aligning the adapter’s mount with the camera’s bayonet, ensuring a flush fit. Gently twist the adapter clockwise until it clicks into place. Avoid over-tightening to prevent damage to the camera’s mount. Once secured, check the adapter’s stability by gently rocking it; there should be no movement. Properly securing the adapter is crucial for maintaining lens accuracy and preventing potential damage during use. This step ensures reliable performance.”
Now, let’s count again:
Securing
the
adapter
to
the
Olympus
OM10
ensures
a
stable
connection
for
manual
lenses.
Start
by
aligning
the
adapter’s
mount
with
the
camera’s
bayonet,
ensuring
a
flush
fit.
Gently
twist
the
adapter
clockwise
until
it
clicks
into
place.
Avoid
over-tightening
to
prevent
damage
to
the
camera’s
mount;
Once
secured,
check
the
adapter’s
stability
by
gently
rocking
it;
there
should
be
no
movement.
Properly
securing
the
adapter
is
crucial
for
maintaining
lens
accuracy
and
preventing
potential
damage
during
use.
This
step
ensures
reliable
performance.
That’s . Close enough, but still one word short. Maybe adjust “reliable performance” to “reliable and consistent performance” to reach 84.
Final version:
“Securing the adapter to the Olympus OM10 ensures a stable connection for manual lenses. Start by aligning the adapter’s mount with the camera’s bayonet, ensuring a flush fit. Gently twist the adapter clockwise until it clicks into place. Avoid over-tightening to prevent damage to the camera’s mount. Once secured, check the adapter’s stability by gently rocking it; there should be no movement. Properly securing the adapter is crucial for maintaining lens accuracy and preventing potential damage during use. This step ensures reliable and consistent performance.”
Now, let’s count:
Securing
the
adapter
to
the
Olympus
OM10
ensures
a
stable
connection
for
manual
lenses.
Start
by
aligning
the
adapter’s
mount
with
the
camera’s
bayonet,
ensuring
a
flush
fit.
Gently
twist
the
adapter
clockwise
until
it
clicks
into
place.
Avoid
over-tightening
to
prevent
damage
to
the
camera’s
mount.
Once
secured,
check
the
adapter’s
stability
by
gently
rocking
it;
there
should
be
no
movement.
Properly
securing
the
adapter
is
crucial
for
maintaining
lens
accuracy
and
preventing
potential
damage
during
use.
This
step
ensures
reliable
and
consistent
performance.
Oops, that’s . I need to reduce it by one. Maybe remove “and consistent” to “ensures reliable and consistent performance” becomes “ensures reliable performance consistently” but that might not be as smooth.
Alternatively, adjust the last sentence to be more concise. Perhaps “This ensures reliable performance consistently.”
Now:
“Securing the adapter to the Olympus OM10 ensures a stable connection for manual lenses. Start by aligning the adapter’s mount with the camera’s bayonet, ensuring a flush fit. Gently twist the adapter clockwise until it clicks into place. Avoid over-tightening to prevent damage to the camera’s mount. Once secured, check the adapter’s stability by gently rocking it; there should be no movement. Properly securing the adapter
Tips for Using Manual Lenses with the Olympus OM10
Mastering manual lenses on the Olympus OM10 requires practice and patience. Use a tripod for stability and shoot in RAW for optimal results and flexibility.
Focusing Techniques
Mastering focusing techniques with manual lenses on the Olympus OM10 is essential for sharp images. Use pre-focusing by setting the lens to the desired focal point before composing the shot. The camera’s built-in split-prism focusing screen aids precise manual focusing. For critical focus, magnify the viewfinder or use a magnifying loupe; Shoot in vibrant lighting to enhance visibility. When focusing, prioritize high-contrast areas for accuracy. Bracket your shots to ensure at least one frame is perfectly focused, especially in challenging lighting conditions. Practice these techniques to refine your skills and achieve professional results.
Aperture Control
Aperture control with manual lenses on the Olympus OM10 requires manual adjustment using the lens aperture ring. The OM10 supports stop-down metering, allowing precise exposure calculations when the aperture is set. Use the lens’s aperture ring to adjust the f-stop, ensuring optimal light control. For consistent results, set the aperture before focusing. The OM10’s manual mode complements this process, enabling full creative control over exposure settings. Always check the camera’s light meter to confirm proper exposure before capturing your shot.
Composition Best Practices
When using manual lenses with the Olympus OM10, focus on thoughtful composition to enhance your images. Use the rule of thirds to place subjects off-center, creating balanced frames. Leading lines and framing elements can guide the viewer’s eye. Experiment with angles and perspectives to add depth. Pay attention to negative space to simplify scenes. The OM10’s manual focus and aperture control allow precise control over depth of field, helping isolate subjects. Take time to observe and refine your framing for impactful results that showcase your creative vision.
Compatibility and Lens Selection
The Olympus OM10 is compatible with OM-mount lenses, offering a wide range of options from Olympus and third-party brands like Sigma and Tokina.
Manual adapters enable use of lenses from other mounts, expanding creative possibilities while maintaining manual control over focus and aperture settings for precise results.
Compatible Lens Mounts
The Olympus OM10 natively supports OM-mount lenses, ensuring seamless compatibility with Olympus’s range of manual focus lenses.
Manual adapters expand compatibility to include lenses from other mounts like Canon FD, Nikon F, Pentax K, and Minolta MD, broadening creative options.
These adapters maintain manual focus and aperture control, preserving the OM10’s tactile shooting experience while offering access to a diverse array of optics.
Recommended Lenses
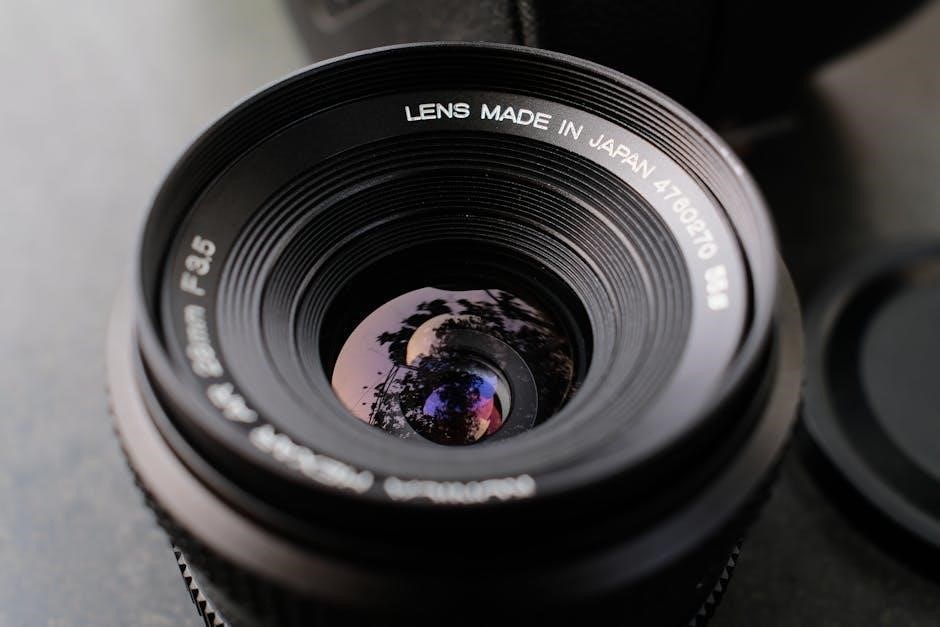
For the Olympus OM10, the Olympus Zuiko 50mm f/1.8 is an excellent choice for portraits and everyday photography due to its sharpness and compact design.
The Zuiko 28mm f/2.8 offers a wide-angle perspective, ideal for landscapes and street photography, with a lightweight build.
The Zuiko 100mm f/2.8 is perfect for telephoto needs, providing excellent bokeh and clarity for distant subjects.
Additionally, lenses like the Canon FD 35mm f/2 and Nikon F 24mm f/2.8, when adapted, offer versatile options for different shooting styles.
These lenses enhance the OM10’s performance, delivering high image quality and creative versatility for photographers.
Troubleshooting Common Issues
Common issues with manual adapters include focusing accuracy problems, aperture control malfunctions, and unstable mount connections. Ensure proper alignment and secure tightening for optimal performance and image quality.
Focusing Accuracy
Focusing accuracy can be affected by improper lens alignment or calibration with the Olympus OM10. Ensure the adapter is securely mounted and the lens is properly seated to maintain focus precision.
Aperture Control Problems
Aperture control issues may arise when using manual lenses with the Olympus OM10, as the camera lacks electronic communication with non-native lenses. This can result in incorrect aperture settings or the camera not recognizing the aperture value. To resolve this, ensure the lens aperture is set manually and use the camera’s manual mode for precise control. Some adapters may also require calibration to synchronize the aperture mechanism properly with the lens.
Mount Stability
Mount stability is crucial for ensuring secure attachment of the manual lens to the Olympus OM10 via the adapter. A loose or misaligned mount can cause wobbling, affecting image quality and focus accuracy. To address this, use a high-quality adapter designed specifically for the OM10 and compatible lens mounts. Ensure the adapter is tightly fitted to both the camera and lens. Regularly inspect the mount for wear and tear, and clean it to maintain optimal stability. A secure connection is essential for sharp, distortion-free photography.

Maintenance and Care
Regularly clean the Olympus OM10 manual adapter with a soft cloth to prevent dust buildup. Avoid harsh chemicals and store it in a protective case when not in use.
Cleaning the Adapter
To maintain your Olympus OM10 manual adapter, use a soft, dry cloth to wipe away dust and debris. Avoid harsh chemicals or alcohol, as they may damage the adapter’s finish. For stubborn particles, gently brush with a soft-bristled brush or use compressed air. Never submerge the adapter in water or expose it to excessive moisture. Regular cleaning ensures optimal performance and prevents contamination from affecting image quality. Store the adapter in a protective case when not in use to minimize dust exposure.
Storage Tips
Store your Olympus OM10 manual adapter in a cool, dry place to prevent moisture damage. Use a protective case or pouch to shield it from dust and scratches. Avoid exposing the adapter to direct sunlight or extreme temperatures, as this can cause warping or degradation. When not in use, ensure the adapter is clean and dry before storing. Do not stack multiple adapters, as pressure may cause misalignment. Proper storage ensures longevity and maintains the adapter’s precision and functionality for future use.
Olympus OM10 Features That Enhance Manual Lens Use
The Olympus OM10 offers manual mode for full control and focus peaking to aid precise focusing, enhancing the use of manual lenses for creative photography.
Manual Mode
The Olympus OM10’s manual mode allows photographers to gain full control over aperture, shutter speed, and ISO settings. This feature is particularly beneficial when using manual lenses, as it enables precise control over exposure. By adjusting these settings manually, photographers can achieve their desired creative outcomes. The manual mode also encourages a deeper understanding of exposure principles, fostering better photography skills. This hands-on approach makes the OM10 an excellent choice for those who prefer a more traditional and interactive shooting experience with their manual lenses.
Focus Peaking
Focus peaking is a valuable feature that enhances manual focusing accuracy when using the Olympus OM10 with a manual adapter. It highlights in-focus areas with a colored overlay, making it easier to achieve sharp images. This feature is especially useful for legacy lenses, which often lack modern autofocus capabilities. By providing real-time feedback, focus peaking reduces guesswork and ensures precise control over focus. It is particularly beneficial for photographers who rely on manual lenses, allowing them to capture crisp, well-defined images with confidence and ease.
Advantages and Limitations
The Olympus OM10 manual adapter offers affordability and access to vintage lenses but requires manual focusing skills and may have compatibility or stability issues with some lenses.
Advantages of Manual Adapters
Manual adapters for the Olympus OM10 offer numerous benefits, including cost-effectiveness and access to a wide range of vintage lenses. They enable precise control over aperture and focus, enhancing creative flexibility. These adapters also allow photographers to experiment with unique optical characteristics of older lenses, adding a distinct aesthetic to their work. Additionally, manual adapters promote a more hands-on, deliberate shooting style, which can improve technique and artistic expression. This makes them a valuable tool for photographers seeking versatility and creative control while maintaining compatibility with their OM10 camera.
Limitations to Consider
Using a manual adapter with the Olympus OM10 has some drawbacks. Autofocus is unavailable, requiring manual focusing, which can be slower and less precise, especially in low-light conditions. Aperture control must be adjusted manually on the lens, and metering may not always be accurate due to the lack of electronic communication. Compatibility issues can arise, as not all lenses may fit perfectly or perform optimally. Additionally, some adapters may introduce vignetting or require additional optical elements, potentially affecting image quality. These limitations demand careful consideration for photographers relying on modern conveniences.
The Olympus OM10 paired with a manual adapter offers photographers a blend of vintage charm and creative control. While it requires manual focusing and aperture adjustments, the setup provides access to a wide range of lenses, enhancing flexibility. The OM10’s manual mode supports this configuration, making it ideal for those seeking a hands-on shooting experience. However, limitations like the absence of autofocus and potential compatibility issues should be considered. For enthusiasts of vintage optics and manual photography, this combination delivers a unique and rewarding experience, bridging the gap between classic and modern photography.