Automating your vehicle’s remote start enhances convenience and comfort, moving beyond basic key fob operation. Secure connections and proper testing are vital for reliable activation.
What is Remote Start and Why Automate It?
Remote start allows you to start your vehicle’s engine from a distance, pre-conditioning the cabin temperature before you enter. Traditionally activated via a key fob, automation elevates this functionality. Automating remote start introduces features like smartphone control, geofencing, and scheduled operation, eliminating the need for manual activation. This is particularly useful in extreme weather, ensuring a comfortable driving experience. Beyond convenience, automation enhances security by allowing remote operation without physically accessing the vehicle. Properly installed systems ensure secure connections and reliable performance, maximizing the benefits of this technology.
Benefits of Automated Remote Start Systems
Automated remote start delivers significant advantages over traditional systems. Smartphone integration provides control from anywhere with cellular service, while geofencing initiates start-up upon approaching a defined location. Scheduled operation allows pre-heating or cooling based on your routine. These features enhance comfort and convenience, especially in harsh climates. Furthermore, automation can improve vehicle longevity by reducing engine stress during cold starts. Secure connections are paramount for reliable operation and preventing unauthorized access. A well-integrated system offers peace of mind and a more enjoyable driving experience, maximizing vehicle usability.

Understanding the Components
Key components include the remote start module, a vehicle integration module for compatibility, a bypass module for security, and various remote control options.
Remote Start Module: Core Functionality
The remote start module serves as the central processing unit, interpreting signals from the remote and initiating the vehicle’s starting sequence. It manages crucial functions like activating the fuel pump, engaging the starter, and monitoring vehicle status. Modern modules often feature built-in safety protocols, preventing operation unless specific conditions are met – such as the parking brake being engaged or the key not being present in the ignition. Programming these modules requires specific procedures, often utilizing a smartphone app or a dedicated programming tool, to ensure seamless integration with the vehicle’s existing systems. Proper module selection is vital for compatibility and reliable performance.
Vehicle Integration Module (VIM): Compatibility
A Vehicle Integration Module (VIM) is crucial for bridging the gap between the remote start system and the vehicle’s complex electronic network. It decodes vehicle-specific signals, enabling features like door lock/unlock control and status monitoring. Compatibility is paramount; selecting a VIM designed for your exact vehicle year, make, and model is essential. Incorrect VIM selection can lead to operational issues or even damage to the vehicle’s electrical system. These modules often handle CAN-bus communication, translating commands and ensuring proper functionality. Thorough research and utilizing compatibility databases are vital before purchasing a VIM.
Bypass Module: Security and Immobilization
The bypass module is a critical security component, circumventing the vehicle’s factory immobilizer system during remote start. Modern vehicles employ sophisticated anti-theft technology, preventing starting without the correct key transponder signal. The bypass module temporarily replicates this signal, allowing the remote start to function securely. Proper programming is vital; incorrect configuration can disable the vehicle or trigger security alerts. High-quality bypass modules prioritize security, employing encryption and fail-safe mechanisms. Installation requires careful attention to wiring and adherence to manufacturer guidelines to maintain vehicle security integrity.
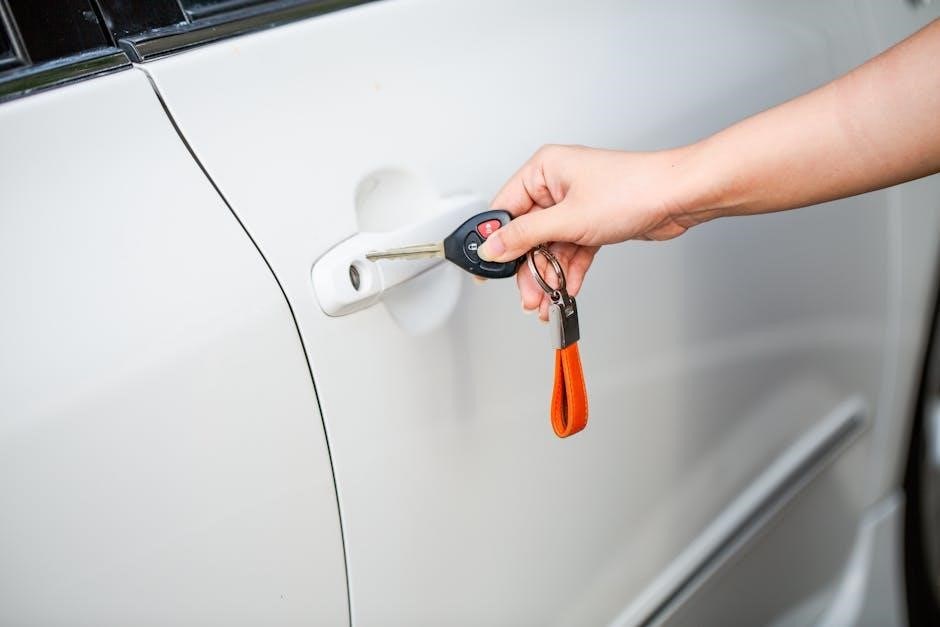
Remote Control Options: Range and Features
Remote start systems offer diverse remote control options, varying in range and functionality. Basic remotes provide start/stop functionality, while advanced models include extended range – up to several miles. Some feature two-way communication, confirming successful start and vehicle status on the remote itself. Smartphone integration via apps is increasingly common, offering control from anywhere with cellular connectivity. Additional features may encompass heated seat activation, climate control adjustment, and even vehicle location tracking. Consider your typical usage scenario when selecting a remote; longer range is beneficial for larger properties or urban environments.

Pre-Installation Considerations

Before installation, verify vehicle compatibility and acquire accurate wiring diagrams. Integrating with existing security systems and identifying a suitable power source are crucial steps.
Vehicle Compatibility Check
Ensuring compatibility is the foundational step before any remote start installation. Not all vehicles readily accept aftermarket systems; therefore, a thorough check is paramount. Manufacturers often provide compatibility lists on their websites, detailing specific year, make, and model support. These lists indicate whether a standard installation is possible or if additional modules, like a Vehicle Integration Module (VIM), are required to bypass complex factory security or data networks.
Furthermore, consider transmission type – automatic transmissions generally pose fewer challenges than manual transmissions. Incorrect installation on a manual transmission could create safety hazards. Confirming compatibility prevents wasted time, effort, and potential damage to your vehicle’s electrical system. Always consult the remote start kit’s documentation and the vehicle’s owner’s manual.
Wiring Diagram Acquisition
Obtaining accurate wiring diagrams is crucial for a successful and safe remote start installation. Vehicle-specific diagrams detail the location and function of essential wires – power, ignition, accessory, and starter. These diagrams aren’t always readily available in standard repair manuals; dedicated automotive wiring services or online databases often provide the necessary information.
Confirm the diagram matches your vehicle’s exact year and trim level, as wiring can vary. Identifying the correct wires prevents misconnections that could damage the vehicle’s electrical system or render the remote start inoperable. A multimeter is invaluable for verifying wire functions before making any connections, ensuring accuracy and minimizing risks.
Security System Integration
Integrating a remote start with an existing vehicle security system requires careful consideration to avoid conflicts. Many aftermarket remote start systems can interface with factory or aftermarket alarms, often utilizing a bypass module for seamless operation. However, improper integration can trigger false alarms or disable security features.
Consult both the remote start and security system manuals for specific integration instructions. Some systems require a data interface module to translate signals correctly. Disconnecting the vehicle’s battery during installation is vital to prevent electrical damage. Thorough testing after installation confirms both systems function correctly and without interference.
Power Source Identification
Locating appropriate power sources is crucial for a successful remote start installation. Identify a constant 12-volt power source, typically found under the dashboard, to supply the module even when the ignition is off. Accessory and ignition wires are also essential; these activate when the key is turned to the corresponding positions.
A test light or multimeter is invaluable for verifying wire functionality. Multiple power wires may need dividing among the vehicle’s 12-volt circuits. Always consult the vehicle’s wiring diagram and the remote start module’s manual for precise wire locations and color codes to ensure correct connections.

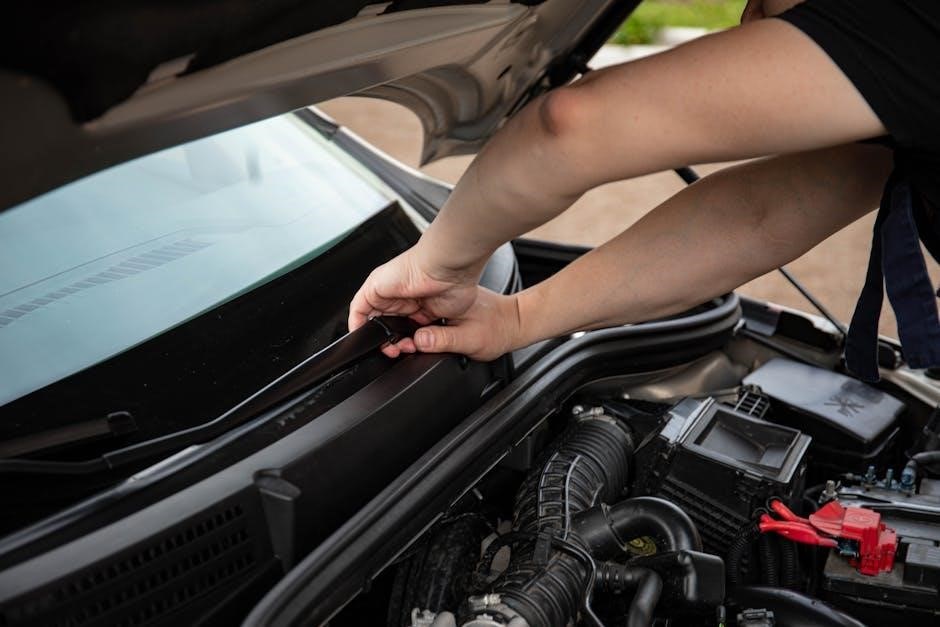
Installation Process: Step-by-Step
Begin by carefully connecting the power sources, ignition, accessory, and starter wires, referencing diagrams. Secure all connections before module programming for optimal results.
Locating and Connecting Power Sources
Identifying the correct power sources is crucial for a successful remote start installation. Typically, you’ll need to locate a constant 12-volt power source that remains active even when the ignition is off. A fused connection is preferred for safety. Next, find the ignition power wire, which activates when the key is turned to the ‘on’ position. Accessory power is also needed, providing power to features like the radio and climate control.
Carefully connect these wires according to the remote start module’s instructions, ensuring proper insulation to prevent shorts. Dividing multiple power wires among the vehicle’s 12-volt sources can balance the electrical load. Double-check all connections for security before proceeding to the next step.
Ignition, Accessory, and Starter Wire Connections
Precisely connecting the ignition, accessory, and starter wires is paramount. The ignition wire energizes the vehicle’s ignition system, while the accessory wire powers non-essential systems. The starter wire, when activated, engages the starter motor to initiate engine combustion.
Ensure these connections align perfectly with the remote start module’s wiring diagram. Incorrect wiring can prevent the system from functioning or, worse, damage the vehicle’s electrical system. Securely crimp or solder all connections and insulate them thoroughly with electrical tape or heat shrink tubing to prevent shorts and ensure a reliable connection.
Bypass Module Wiring and Programming
The bypass module is crucial for vehicles with factory immobilizer systems. It temporarily overrides the security system during remote start, allowing the engine to start without the key present. Wiring involves connecting the module to the vehicle’s data network, typically CAN bus, and power sources.
Programming the bypass module requires specific procedures outlined in the module’s manual, often involving a programming tool or sequence of key turns and ignition cycles. Correct programming is essential; failure can result in a no-start condition or security system malfunction. Double-check all connections and programming steps.
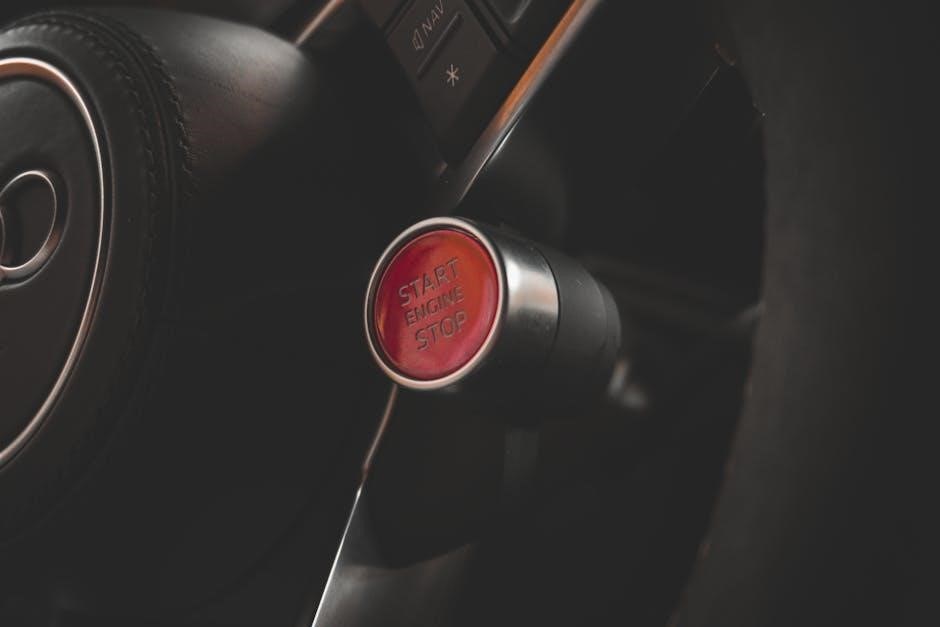
Remote Start Module Programming
Programming the remote start module establishes communication with the vehicle and configures its operation. This typically involves selecting the vehicle’s make, model, and year using a programming tool or a specific sequence of button presses on the module itself. The process configures parameters like run time, remote start duration, and safety features.
Carefully follow the manufacturer’s instructions, as incorrect programming can lead to malfunctions. Some modules require vehicle-specific data or bypass module integration for successful programming. Verify all settings after programming to ensure proper functionality and safety. A successful program is vital for reliable operation.
Testing and Troubleshooting
Post-installation, verify secure connections and remote activation. Address no-start issues by checking wiring and security system conflicts for optimal performance.
Initial System Test: Remote Activation
Begin the testing phase by ensuring the vehicle is in Park (or Neutral for manual transmissions) and the parking brake is engaged; With the driver-side door closed, utilize the remote control to initiate the remote start sequence. Observe if the engine starts smoothly and runs consistently. Listen for any unusual noises during startup or operation.
Verify that the appropriate accessories, such as the radio or climate control, activate as programmed. If the engine fails to start, immediately cease testing and revisit the wiring connections, focusing on the ignition, starter, and power sources. Confirm the bypass module is correctly programmed for your vehicle’s security system. A successful remote start indicates a properly installed and functioning system.
Checking for Secure Connections
Thoroughly inspect all wiring connections made during the installation process. Gently tug on each wire at its connection point to ensure it’s firmly secured and won’t easily disconnect. Pay close attention to crimped connections, verifying the crimp is tight and the wire is fully inserted.
Look for any exposed wire strands that could potentially cause a short circuit. Properly insulate any exposed wires with electrical tape or heat shrink tubing. Secure the remote start module and bypass module, preventing them from moving around during vehicle operation. Loose connections are a primary cause of remote start failures and should be meticulously addressed.
Troubleshooting Common Issues: No Start
If the vehicle fails to start with the remote, first re-verify all power and ignition wire connections. Confirm the bypass module is correctly programmed for your vehicle’s security system, as conflicts are common. Check the vehicle’s battery voltage; a low battery can prevent remote start operation.
Ensure the parking brake is engaged, as most systems require this for safety. Review the remote start module’s programming to confirm it’s compatible with your vehicle’s specific configuration. A faulty relay or a blown fuse within the remote start system can also cause a no-start condition – inspect these components carefully.
Addressing Security System Conflicts
Conflicts between the factory security system and the remote start are frequent. The bypass module is crucial; it temporarily disables the security system during remote start, then re-enables it upon key insertion. Ensure the bypass module is correctly programmed for your vehicle’s exact year, make, and model.
If issues persist, verify the security system’s sensitivity settings. Some systems may require reprogramming or adjustments to accommodate the remote start. Disconnecting the vehicle battery briefly after installation can sometimes reset the security system and resolve conflicts. Consult your vehicle’s owner’s manual or a professional installer for specific guidance.
Advanced Automation Features
Smartphone integration, geofencing, and timer-based start options elevate remote start functionality, offering customized control and convenience through app-based automation.
Smartphone Integration: App Control
Modern remote start systems frequently offer smartphone integration, expanding control beyond traditional key fobs. Dedicated mobile applications allow users to remotely start, lock, and unlock their vehicles from virtually anywhere with cellular connectivity. These apps often provide real-time vehicle status updates, including temperature and security alerts.
Advanced features within the app may include the ability to set timers, control climate settings before entering the vehicle, and even track the vehicle’s location. Secure authentication protocols are crucial to prevent unauthorized access, typically involving user accounts and multi-factor verification. This integration provides a seamless and convenient user experience, enhancing the overall functionality of the remote start system.
Geofencing: Automated Start Based on Location
Geofencing leverages GPS technology to automatically initiate remote start when the vehicle enters or exits a predefined geographical area. Users configure virtual boundaries – “fences” – through a smartphone application, specifying desired actions upon crossing these lines. For example, the vehicle could automatically start when approaching home after work.
This feature enhances convenience by pre-conditioning the vehicle’s interior temperature without manual intervention. Security considerations are paramount; robust geofencing systems employ precise location tracking and secure communication protocols. Customizable settings allow users to adjust the activation radius and operational parameters, ensuring optimal performance and preventing unintended starts;
Timer-Based Start: Scheduled Operation
Timer-based start functionality allows users to program the remote start system to activate at specific times. This feature is ideal for pre-heating or pre-cooling the vehicle’s cabin before daily commutes, ensuring a comfortable driving experience. Scheduling is typically managed through a smartphone app or the vehicle’s infotainment system.
Users can set multiple timers for different days of the week, accommodating varying schedules. Advanced systems offer customizable run-time durations, limiting operation to a pre-defined period. This prevents excessive fuel consumption or battery drain. Reliable timer functionality relies on accurate time synchronization and a stable system configuration.
Temperature-Based Start: Climate Control Automation
Temperature-based start leverages external temperature sensors to automatically initiate the remote start system. This intelligent feature activates the vehicle’s climate control when temperatures fall below or rise above user-defined thresholds. It’s perfect for maintaining a comfortable cabin temperature regardless of external conditions.
Configuration typically involves setting desired temperature ranges via a smartphone app. The system monitors ambient temperature and starts the engine if conditions warrant, ensuring the vehicle is at the ideal temperature upon entry. This feature optimizes comfort and reduces the need for manual remote starts, enhancing convenience and fuel efficiency.
Safety Precautions
Prioritize safety by disconnecting the vehicle battery before installation. Handle wires carefully, ensuring proper insulation to prevent shorts and damage to vital systems.
Disconnecting the Vehicle Battery
Before commencing any remote start system installation, disconnecting the vehicle’s battery is paramount for safety. This crucial step prevents accidental shorts, electrical shocks, and potential damage to sensitive electronic components. Locate the negative terminal of the battery – typically marked with a (-) symbol – and carefully loosen the nut securing the cable clamp. Gently remove the cable from the terminal, ensuring it doesn’t accidentally reconnect during the installation process.
Insulate the disconnected cable end to further prevent accidental contact. This simple precaution safeguards both you and the vehicle’s electrical system. Remember to have your radio security codes readily available, as disconnecting the battery may reset some vehicle systems.
Proper Wire Handling and Insulation
Maintaining meticulous wire management is critical during remote start installation. Avoid sharp bends or pinching of wires, as this can compromise their integrity and lead to intermittent connections or shorts. Utilize proper wire routing techniques, keeping wires away from moving parts, hot surfaces, and sharp edges within the vehicle.
Employ high-quality electrical tape or heat-shrink tubing to thoroughly insulate all connections. This prevents accidental shorts and corrosion, ensuring a reliable and long-lasting installation. Secure wires with zip ties or wire loom to maintain a neat and organized appearance, minimizing the risk of damage or interference.
Avoiding Damage to Vehicle Systems
Prioritize safeguarding your vehicle’s existing electrical systems during installation. Incorrect wiring can potentially damage sensitive electronic components, including the ECU, airbags, and security systems. Always double-check wiring diagrams and connection points before making any alterations.
Exercise extreme caution when working near the steering column and airbag systems; disconnecting the battery is paramount. Avoid tapping into critical vehicle circuits without a thorough understanding of their function. If unsure, consult a qualified automotive electrician to prevent costly repairs and ensure a safe, functional remote start system;

Maintenance and Updates
Regularly inspect wiring for wear, and replace remote batteries promptly. Firmware updates, when available, can optimize performance and add new features to your system.
Regular System Checks
Consistent monitoring of your automated remote start system is crucial for sustained reliability. Periodically verify the remote control’s operational range and responsiveness, ensuring seamless activation from various distances. Visually inspect all wiring connections, paying close attention to areas prone to vibration or environmental exposure, looking for any signs of corrosion or damage. Confirm the system activates and deactivates smoothly, without unusual delays or noises.
Furthermore, check for any error indicators on the module itself, if equipped. A proactive approach to these checks can identify potential issues before they escalate into significant problems, saving you time and costly repairs. Don’t neglect to test the system under different weather conditions, as temperature fluctuations can sometimes affect performance.
Firmware Updates
Modern remote start systems often receive firmware updates to enhance functionality, improve security, and address potential bugs. Regularly check the manufacturer’s website for available updates specific to your module. These updates are typically delivered via USB or a dedicated smartphone application, requiring a direct connection to the system.
Carefully follow the manufacturer’s instructions during the update process, as interruption can potentially brick the module. Firmware updates can introduce new features like improved smartphone integration or refined geofencing capabilities. Keeping your system’s firmware current ensures optimal performance and compatibility with evolving vehicle technologies, maximizing your investment and user experience.
Remote Control Battery Replacement
Maintaining your remote control is crucial for consistent operation. When the range diminishes or the response becomes sluggish, it’s likely time for a battery replacement. Most remotes utilize common coin cell batteries, such as CR2032s, but always verify the correct type in your owner’s manual. Carefully open the remote casing, typically with a small screwdriver, and replace the old battery with a new one, ensuring correct polarity.
After replacement, test the remote’s functionality to confirm proper operation. Dispose of the old battery responsibly, following local regulations for electronic waste. Regular battery checks, ideally every six months, prevent unexpected failures and ensure your remote start system remains readily accessible when needed.